How To Develop An App Like TuneIn Radio: A Complete Guide

how to make an app like tune in radio

The demand for audio streaming apps is at an all-time high, with TuneIn Radio leading the market. It offers live radio, podcasts, and on-demand content, making it an excellent choice for users who love audio entertainment. If you’re planning to develop an app like TuneIn Radio, this guide will take you through the entire process, from ideation to launch.

Step 1: Market Research and Planning

Before jumping into development, conduct thorough market research to identify trends, target audiences, and competitors. Some key points to consider include:

  • User Preferences: What do listeners expect from a radio streaming app?
  • Competitor Analysis: Analyze apps like TuneIn, iHeartRadio, and Spotify to identify their strengths and weaknesses.
  • Monetization Strategies: Decide whether to offer a freemium model, ads, or subscriptions.

Step 2: Defining Key Features

A successful radio streaming app should include the following features:

  • Live Radio Streaming: Access to AM/FM and internet radio stations.
  • Podcast Integration: A vast library of podcasts.
  • On-Demand Streaming: Ability to play content anytime.
  • Personalized Recommendations: AI-based content suggestions.
  • Offline Listening: Users should be able to download content.
  • Cloud Syncing: Save and sync user preferences across devices.
  • Multiple Device Support: Compatibility with smartphones, smart speakers, and wearables.
  • Subscription Plans: Premium plans with exclusive features and ad-free listening.

Step 3: Choosing the Tech Stack

The right technology stack is crucial for app performance and scalability. Here’s a suggested tech stack:

  • Frontend: React Native (for cross-platform), Swift (iOS), Kotlin (Android)
  • Backend: Node.js or Django for API management
  • Streaming Protocols: HLS (HTTP Live Streaming), RTMP (Real-Time Messaging Protocol)
  • Database: PostgreSQL or Firebase for real-time data storage
  • Cloud Services: AWS, Google Cloud, or Azure for hosting
  • AI & ML: TensorFlow or OpenAI for content recommendations

Step 4: UI/UX Design

An intuitive and visually appealing UI enhances the user experience. Focus on:

  • Simple Navigation: Easy access to stations, playlists, and settings.
  • Dark Mode: Aesthetic and energy-efficient.
  • Custom Playlists: Let users create and manage their own playlists.
  • Adaptive Layout: Ensure responsiveness across devices.

Step 5: Development Process

  1. Prototyping: Create wireframes and mockups.
  2. MVP Development: Start with a Minimum Viable Product (MVP) to test core functionalities.
  3. Backend Development: Set up servers, databases, and APIs.
  4. Frontend Development: Implement UI components and integrate APIs.
  5. Testing & QA: Conduct thorough testing to fix bugs and optimize performance.

Step 6: Monetization Strategies

To generate revenue, consider the following models:

  • Ad-Supported Free Model: Display banner and audio ads.
  • Subscription-Based Model: Offer premium plans with exclusive content.
  • Affiliate Marketing: Promote products and services through partnerships.

Step 7: Deployment and Marketing

After development, launch the app on the App Store and Google Play Store. Use marketing strategies like:

  • Social Media Promotions: Run targeted ads and influencer campaigns.
  • SEO Optimization: Optimize app descriptions for better discoverability.
  • App Store Optimization (ASO): Improve rankings by using relevant keywords.
  • Partnerships: Collaborate with radio stations and content creators.

Step 8: Maintenance and Future Updates

Post-launch, continuously update your app with:

  • New Features: Based on user feedback and market trends.
  • Bug Fixes: Regular patches to ensure a smooth experience.
  • Scalability Enhancements: Optimize servers to handle growing traffic.

Conclusion

Building an app like TuneIn Radio requires careful planning, a robust tech stack, and an effective marketing strategy. By following these steps, you can create a feature-rich, scalable, and engaging radio streaming app that stands out in the competitive market.

Are you ready to bring your audio streaming app idea to life? Let’s get started!

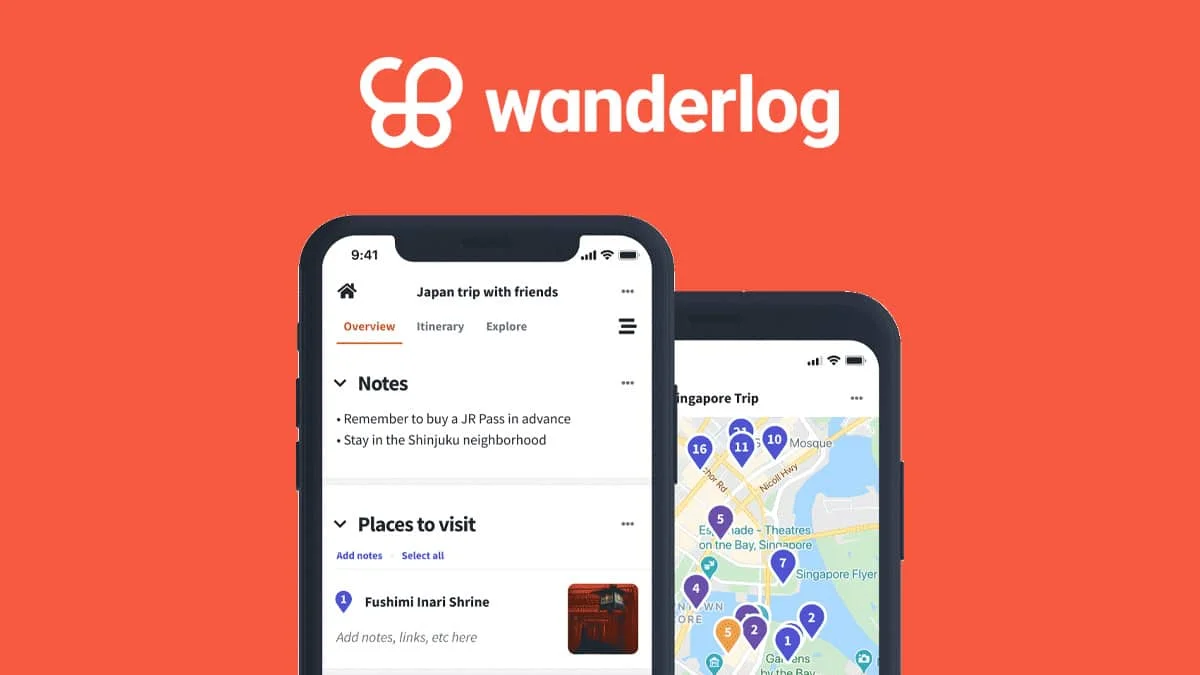
Wanderlust and Code: Your Guide to Building an App Like Wanderlog

Wanderlust and Code: Your Guide to Building an App Like Wanderlog

In today’s digitally connected world, travel planning has transformed. Gone are the days of bulky guidebooks and scattered notes. Apps like Wanderlog have emerged as indispensable companions for globetrotters, offering a seamless platform to discover, plan, and share travel experiences.

Dreaming of creating your own travel planning app that captures the essence of Wanderlog? You’ve come to the right place! This comprehensive guide will walk you through the key steps involved in developing an app that empowers users to craft unforgettable journeys.

Understanding the Magic of Wanderlog

Before diving into development, let’s appreciate what makes Wanderlog so popular. Its core features typically include:

  • Trip Planning: Allowing users to create detailed itineraries with specific locations, activities, and notes.
  • Discovery: Enabling users to browse and save interesting places, attractions, and restaurants.
  • Collaboration: Facilitating group trip planning with shared itineraries and voting features.
  • Mapping Integration: Visualizing planned routes and points of interest on interactive maps.
  • Budgeting: Helping users track expenses and manage their travel budget.
  • Offline Access: Providing access to saved information even without an internet connection.
  • User-Generated Content: Allowing users to share their own travel experiences, photos, and recommendations.

Your app doesn’t necessarily need to replicate every single feature from day one, but understanding these core functionalities will help you define your Minimum Viable Product (MVP) and future roadmap.

The Journey Begins: Key Steps to App Development

Building a successful app like Wanderlog requires a strategic and well-executed plan. Here’s a breakdown of the essential stages:

1. Define Your Niche and Unique Selling Proposition (USP):

While Wanderlog is a comprehensive travel planner, consider if you want to focus on a specific niche. Perhaps your app will cater to:

  • Adventure Travelers: Focusing on outdoor activities, hiking trails, and extreme sports.
  • Foodie Travelers: Centering around culinary experiences, restaurant recommendations, and food tours.
  • Budget Travelers: Emphasizing affordable accommodations, free activities, and cost-saving tips.
  • Sustainable Travelers: Highlighting eco-friendly options and responsible tourism practices.

Identifying your niche and USP will help you target a specific audience and differentiate your app in the market.

2. Conduct Thorough Market Research:

Analyze your competitors (including Wanderlog and other travel apps). Understand their strengths, weaknesses, user reviews, and pricing models. Identify gaps in the market that your app can fill.

3. Define Your App’s Features:

Based on your niche and market research, create a detailed list of features for your MVP and future iterations. Prioritize features based on their value to the user and feasibility of development.

4. Design the User Experience (UX) and User Interface (UI):

This is a crucial stage. Your app should be intuitive, visually appealing, and easy to navigate. Focus on:

  • User Flows: Mapping out how users will interact with different features.
  • Wireframing: Creating basic skeletal structures of your app screens.
  • Prototyping: Developing interactive mockups to test usability.
  • UI Design: Crafting the visual elements, including color schemes, typography, and icons, ensuring a consistent and engaging aesthetic.

5. Choose Your Technology Stack:

Selecting the right technologies is vital for performance, scalability, and maintainability. Consider:

  • Mobile Development: Native (iOS and Android specific), Cross-Platform (React Native, Flutter), or Hybrid. Each has its pros and cons regarding performance, development time, and cost.
  • Backend Development: Languages (Python, Node.js, Java, Ruby), Frameworks (Django, Express.js, Spring), and Databases (SQL, NoSQL).
  • Mapping and Location Services: Integration with map providers like Google Maps or Mapbox, and utilizing GPS for location-based features.
  • Cloud Services: Platforms like AWS, Google Cloud, or Azure for hosting, data storage, and other backend functionalities.

6. Develop the App:

This is where the actual coding happens. You can choose to:

  • Hire an In-house Development Team: Provides more control but can be costly.
  • Outsource to a Development Agency: Offers expertise and flexibility but requires careful selection and management.
  • Hire Freelance Developers: Can be cost-effective but requires strong project management skills.

Regardless of the approach, ensure clear communication, agile methodologies, and regular testing throughout the development process.

7. Implement Key Features:

Focus on building the core functionalities defined in your MVP first. This might include:

  • User registration and profiles.
  • Basic trip planning with location search and saving.
  • Map integration for visualizing planned locations.
  • Simple itinerary creation and management.

8. Integrate APIs and Third-Party Services:

Leverage existing APIs to enhance your app’s functionality. This could include:

  • Places APIs: For searching and retrieving information about points of interest.
  • Geocoding APIs: For converting addresses to coordinates and vice-versa.
  • Weather APIs: To provide weather forecasts for planned destinations.
  • Translation APIs: To help users understand information in different languages.
  • Payment Gateways: If you plan to offer premium features or booking functionalities.

9. Rigorous Testing and Quality Assurance (QA):

Thorough testing is essential to identify and fix bugs, ensure performance, and provide a seamless user experience. Conduct various types of testing, including:

  • Unit Testing: Testing individual components of the code.
  • Integration Testing: Testing how different modules of the app work together.
  • User Acceptance Testing (UAT): Getting feedback from potential users.
  • Performance Testing: Ensuring the app can handle a large number of users and data.

10. Deployment and Launch:

Once your app is thoroughly tested and polished, it’s time to deploy it to the app stores (Apple App Store and Google Play Store). This involves:

  • Creating developer accounts.
  • Preparing app store listings (app name, description, keywords, screenshots, videos).
  • Submitting your app for review.

11. Marketing and Promotion:

Launching your app is just the beginning. You need a solid marketing strategy to reach your target audience. This can include:

  • App Store Optimization (ASO) to improve visibility in search results.
  • Social media marketing.
  • Content marketing (blog posts, articles, travel guides).
  • Paid advertising.
  • Influencer marketing.
  • Public relations.

12. Post-Launch Monitoring and Iteration:

Continuously monitor your app’s performance, user feedback, and analytics. Identify areas for improvement and release updates with bug fixes, new features, and enhancements based on user needs and market trends.

Challenges and Considerations:

Developing an app like Wanderlog comes with its own set of challenges:

  • Data Integration: Handling and organizing vast amounts of travel-related data.
  • Scalability: Ensuring your backend infrastructure can handle a growing user base.
  • Competition: Standing out in a crowded market.
  • Monetization: Determining a sustainable revenue model (e.g., premium features, advertising, affiliate partnerships).
  • User Acquisition and Retention: Attracting and keeping users engaged.

Also Read : MVP In Software Development: Why is it important for businesses?

The Road Ahead:

Building an app like Wanderlog is a significant undertaking, but with careful planning, a strong team, and a user-centric approach, you can create a valuable tool for travelers worldwide. Remember to start with a clear vision, iterate based on feedback, and continuously strive to enhance the user experience.

So, are you ready to embark on this exciting journey of turning your wanderlust into code? The world awaits your innovative travel companion!

Evaluating AI Model Performance: Key Metrics and Techniques

Evaluating AI Model Performance: Key Metrics and Techniques

In the rapidly evolving world of artificial intelligence, evaluating AI model performance is critical to ensuring reliability, accuracy, and efficiency. Whether you are an AI development company in India or an enterprise leveraging AI, understanding key metrics and techniques can significantly impact the effectiveness of AI solutions. This article explores essential evaluation metrics and methodologies used to assess AI models.

Key Metrics for Evaluating AI Models

1. Accuracy

Accuracy is the ratio of correctly predicted instances to the total instances. It is a fundamental metric for classification models but may not be reliable for imbalanced datasets.

2. Precision, Recall, and F1 Score

  • Precision measures the proportion of correctly predicted positive observations to total predicted positives.
  • Recall (Sensitivity) calculates the proportion of actual positives correctly identified.
  • F1 Score is the harmonic mean of precision and recall, providing a balanced evaluation.

3. Mean Squared Error (MSE) and Mean Absolute Error (MAE)

For regression models, MSE and MAE measure the average squared or absolute difference between actual and predicted values. Lower values indicate better model performance.

4. ROC-AUC Score

The Receiver Operating Characteristic (ROC) curve and Area Under the Curve (AUC) assess the performance of classification models, highlighting their ability to distinguish between classes effectively.

5. Log Loss

Logarithmic loss quantifies the uncertainty in predictions, with lower values indicating a well-calibrated model.

6. Confusion Matrix

A confusion matrix presents a breakdown of true positives, false positives, true negatives, and false negatives, offering a more comprehensive model evaluation.

Techniques for AI Model Performance Evaluation

1. Cross-Validation

Cross-validation splits data into multiple subsets, training the model on some and testing on others to enhance reliability.

2. A/B Testing

A/B testing involves comparing two model versions to determine which performs better in real-world scenarios.

3. Hyperparameter Tuning

Optimizing hyperparameters using methods like Grid Search and Random Search improves model accuracy and efficiency.

4. Bias and Fairness Evaluation

AI models should be free from biases that could lead to unfair or unethical decisions. Evaluating fairness metrics ensures responsible AI development.

5. Explainability and Interpretability

Techniques like SHAP (Shapley Additive Explanations) and LIME (Local Interpretable Model-agnostic Explanations) help understand how models make decisions, building trust among stakeholders.

Conclusion

Effective evaluation of AI models ensures their reliability, efficiency, and accuracy. As AI development companies in India continue to innovate, leveraging these key metrics and techniques can help businesses optimize AI solutions. If you are looking for expert AI development , partnering with a trusted artificial intelligence development company in India can ensure your AI models perform optimally and drive business success.